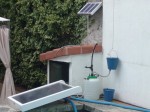
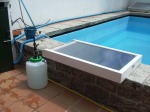
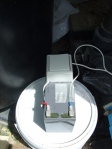
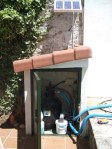
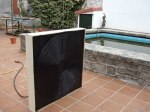
It’s Monday 5th September and clear skies and sunny.  I moved my setup from around the pool to the front garden so i could get 5 or 6 hours of sunlight on my collector to see what the performance was like.

Start point was 30L of well water at 15 degrees and I position my panel due South at about 35ish degrees of vertical inclination which i think was about right.  One of the things I have noticed here in Spain is that panel orientation for thermal and PV panels is less important than in the UK.  There is literally so much light and sun it makes only marginal differences if you are Southeast, Southwest, horizontal or 60 degrees.  PV panels always perform better at correct orientations but my collector seems to work at any angle as long as it is somewhere pointing Southish…..

Optimally positioned my collector reached 60 degrees in 15 minutes and 75 degrees in 22 minutes, left for 30 minutes the water boils.  This isn’t good….after 90 degrees I have noticed it makes odd noises and doesn’t behave as it should.


The pause pump pattern was 15 minutes pause pump for 5 minutes but I did notice an unusual thing in this full on sun position.  The temperature after pumping never drops much below 50 degrees (48) and so I think with a different pump (an inline pump capable of continuous pumping) it may be better to pump all the time.


The end result of the day’s testing was,  after 5 hours of sun the 30L of water that started at 15 degrees was 45 degrees and with almost no difference in the top and bottom of the cylinder.  I would say 42/3 at the bottom and 47 at the top.  The cylinder is uninsulated and so loses some hear through the tiled floor which would account for a degree or two.  There is also loss through the uninsulated sides.  The air temperature was 30 degrees so not too much loss but perhaps a degree or two.

What I need now is the REUK Super Timer so that I don’t have to stand by the equipment when testing.

Anyhoo, that’s all for now.

Monday and Tuesday this week were cloudy with drizzly rain.  I decided to do some testing as before (3.5 hours and 15 minute pause 15 minute pump).

The 30L to start was 16 degrees and after 3.5 hours the temperature of the top 15L was 28 degrees!  Not exactly a hot shower but incredible when you consider the panel got only diffused sunlight and a bit of environmental heat from the 22 degree temperature.

In the working system the pump wouldn’t have energised because there wasn’t enough sunlight to power the PV and pump.  I will have to experiment a little more but what I need now is a 12v timer and longer term a timer and temperature difference controller so that I don’t run my heat exchanger in reverse and lose all my valuable hot water!


I’ve got my new pump (WHALE GP1002 12v SUBMERSIBLE PUMP) bought from Ebay for 8 quid…bargain.

To prove the concept of my new flat plate collector and the 30L got water cylinder I decided on a different setup.  The new setup is….unorthodox.

Trying to set up the inline pump I bought has been a nightmare.  Why would anyone want a 12v pump with 25mm spìgots?

When you work with low voltage PV (almost) everyone works in small or microbore tubing.  Trying to keep the inlet side full of water with my odd setup at the side of the pool was almost impossible.

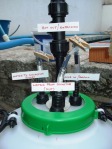
So, I decided to use a submersible pump in the cylinder….Obviously not a workable long term solution but it lets me prove concept.

I’ve had 2 days testing now with similar results.  It has been difficult setting up the entire system, but eventually with Patricia, gaffa tape and pegs I succeeded.

The 8L bucket is now the cold feed in to the bottom of the tank.  The hot feed and return connect to the collector and I now have about 90cm of expansion height and about 25cm to the draw off point for the hot water draw off  (plastic tap).

On both days I started by filling the cylinder with 30L of cold water from the well (about 16 degrees).  There is a little heat absorbtion from direct sunlight and the background temperature of 28 to 30 degrees but it is minimal, I would estimate over the 3.5 hour testing period no more than 5 degrees.

The pattern of pause pump was 15 minutes pause and 5 minutes pump.  In 15 minutes the panel water temperature was 60 degrees and after 5 minutes pumping it dropped to 40 degrees.  leaving the pump for another 5 minutes (20 minutes overall) raised the temperature to 70 degrees and climbing quickly.  The Whale pump has at least two limiting factors: the guarantee is defunct if you pump water at more than 60 degrees  and that the pump shouldn’t be used for more than 15 minutes continuously.

The first issue for the purpose of testing isn’t a big problem.  Although a good long term objective, having water at the bottom of the cylinder (where the pump is) at 60 degrees is unlikely….This temperature would eliminate problems with bacteria especially Legionella pneumophila.  The second issue was a surprise to me but makes sense, submersible pumps are usually used for sinks and showers in short bursts.  My second pause pump configuration was pause 15 minutes and pump 15 minutes.

The temperature in the panel never seems to drop below 40 degrees and so is capable of heating the cylinder with continuous pumping too.  After 3.5 hours of this pause pump configuration the cylinder was hotter at the top but only marginally hotter than the bottom 25% of the cylinder.  I would estimate less than 5 degrees difference.

The water sampled from the first 15L was just over 40 degrees!  A 24 degree increase.  Overall the panel produced 30L of hot shower water in 3.5 hours.  As I have said before, the beauty of this vented direct system with water stratification is that it is incremental.  From a cold start (16 degrees) the system needs a couple of hours to warm the water to shower temperature but after 3 hours it is heating already heated water and becomes MUCH more efficient.  Heating water from 36 degrees to 60 degrees is much easier than 16 to 40.

With direct sunlight and good panel placement (mine is spoiled by tree shade and building shade) and a full sized panel (2m x 1m) I think you could easily fill a 100L insulated direct cylinder in a day and maintaining the top half of the tank at 50 degrees would be easy too.

Next post will be a report on some testing in total cloud cover.  Not as bad as I thought……..

Had to repair a couple of leaks on the hot water container (a 30L polythene barrel).  The fittings seemed OK when I assembled them but with 30L of water and the ‘head’ of water formed by my pump replacement (the 8L bucket 2m high) two of the joints leaked.

I re-bedded the joints and put some silicone on which cured the leaks but now there is a leak between the joint between the barrel and the top…..An irritating drip every minute.  It’s a fault I think in the plastic moulding.  More silicone……

I did some more testing today too.  A sunny day but with quite a few clouds so not perfect conditions.  From a starting temperature of 20 degrees C with the flow stopped it took the panel 12 minutes to reach 50 degrees C and 17 minutes to get to 60 degrees C.  I let the panel go for another 12 minutes and the temperature was 85 degrees and climbing before I chickened out.

The fascinating thing is how efficiently this panel works as a heat exchanger, heating and cooling.  At 85 degrees C I opened the flow and the temperature literally dropped to 50 degrees C in about 7 minutes.  This is an important consideration in your design.

If you do not use any temperature probe controls on your panel and at the very least the top of your hot water cylinder you risk circulating your precious hot water outside to warm the environment!

I don’t have one yet but I have seen a timer and heat controller with 3 probes (top and bottom of the tank) for about 120 pounds.  There is a cheaper way to achieve this protection.  Make sure your PV panel is strong enough to start and run the pump.  Sometimes they look powerful enough but small PV won’t be able to spin the motor to get it started.  If it can run your pump you have a built in controller.  If its cloudy or there isn’t any sun the PV won’t be able to run the pump and so it won’t circulate colder water.  When it’s sunny it will, and there will be hot water in the panel (because its sunny).  Not fool proof but I’m going to try it.

Flate Plate Collector

Having built a very low cost solar thermal collector to heat a small swimming pool I decided to build a more sophisticated flate plate collector linked to a direct domestic hot water system.

After some research looking at the different methods available I decided to build a one third size (about 0.6 square metres) collector using aluminum sheet, polystyrene insulation, silicone tubing, twin wall polycarb roofing and an outer frame of softwood.

Arguments about the relative efficiencies of flate plate collectors and evacuated tube collectors are a little cyclical and academic.  My view is that in a ‘challenging’ climate like the UK an evacuated tube collector is probably best.  I live in central Spain with significantly higher levels of solar radiation and, even in autumn and winter clear blue skies and so flate plate collectors are fine and cheaper..

Before deciding on exact sizes for your panel, do some research on the stock sheet sizes for the key components of the project.  If you go over these standard sizes you will waste material and incur extra costs.  Obviously the size of the flate plate collector is linked to you demand for hot or pre heated water but remember anything bigger than the ‘normal ‘ maximum size of 2m x 1m will weigh 35kg and above and becomes difficult to handle and fix on the roof.  Mounting multiple panels can be a way of overcoming this problem.

I decided to make my panel 600mm x 1020mm (inner collector size) which is a little under a third of the size of a commercial panel.  To make the project realistic I scaled down all of the components to the proportion of approximately a third.  Ideally I wanted the frame to be aluminum or uPVC to eliminate maintenance and improve the appearance of the panel.  The cost and difficulty finding anyone interested in making a simple rectangular frame in those two materials made this impossible so I decided to go for my ‘native’ material (timber).  I am a joiner by trade.

I bought approximately 4m of 120mm x 40mm planed softwood (pine).  This cost 40 euros which I think would have been significantly cheaper in the UK (20 quidish).  The frame needs to be mitred on the top two corners and the joint at the bottom rail is a stopped housing joint.  If joinery isn’t your strong point you could use butt joints with extra long screws or coachbolts.  The idea of making the bottom rail 20mm narrower than the top rail is so that the twin wall polycarb cover slides into position rather than being fixed on all four sides.  On balance this isn’t very important but it makes maintenance easier and I think it looks better.

After gluing and screwing your frame fix your 80mm polystyrene insulation so that it is flush (level with) the back of the frame.  I fixed the insulation with a can of expanded polystyrene foam at a cost of about 6 pounds.  Don’t go mad with the foam it expands to many times its volume and is a very strong glue.  When the foam is dry, cut off the excess and tidy up the joints.  My insulation was free of charge, liberated from a skip after it was used as packing for some metal roof panels being fixed near my house.  The cost of a piece to insulate my panel would probably be around 15 pounds.

You should now have a very solid frame with a flush backside and a 40mm recess on the frontside.  This recess is to accommodate: 1mm of aluminum; 7mm of slightly compressed 9mm silicone tubing; another 1mm of aluminum; 20mm airspace; 6mm of twin wall polycarb sheet and a small 4mm recess to improve appearance.  Unless you can buy the aluminum sheet in exact sizes you will need to cut the sheets to fit your frame.  A jigsaw with metal blade is probably easiest but you could cut it with heavy duty shears used for cutting lead and other sheet materials.  Be careful, the edges are like razors.  Use a file to tidy up the cut edges and be sure to wear gloves and a sturdy shirt with long sleeves for protection.

My first layer of aluminum fitted nice and snug and all I did was use some translucent silicone sealant around the perimeter to hold it in position.  If you wanted you could use the silicone sealant in a grid pattern to ‘stick’ the sheet down.  The reason for referring to silicone is that inside the collector (between the two sheets of aluminum and on the top surface of the top sheet of aluminum) the temperature will go over 150 degrees C.  This would destroy ordinary polythene or plastic.

Now you have to position your ‘serpentine’ of silicone tubing.  I paid about 50p per metre for mine and I have 15m in my panel.  If you find some silicone tubing at a good price buy extra, it’s not easy to find.  To form good bends at the ends of the runs without kinks you need to make some semi circular or circular formers out of something about 7mm thick.  Plywood would be OK, I used the bottoms of plastic cups that were 70mm in diameter.  I left mine in, they aren’t technically necessary but even when the heat distorts them the silicone tubing is held tight in position with the silicone sealer and being sandwiched between the two sheets of aluminum.

The diameter of the ends depends on your silicone tubing, mine wouldn’t go under 70mm diameter without kinking.  Set out your grid pattern maximizing the amount of tubing and make sure you have the ‘in’ and ‘out’ tubes emerging from the corners of the bottom rail of your frame.  You will need to drill two holes to let these two tubes out.

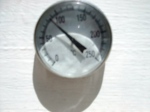
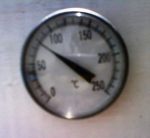
I used masking tape to temporarily hold the tubing in place and dots of silicone sealant to fix the tubing to the clean bottom sheet of aluminum.  The colour of this sheet is irrelevant (I assume) but it should be clean of grease and oil.  You will need to drill a small hole in the top rail of your frame to locate a simple meat thermometer.  Make sure the probe on the thermometer (mine was 125mm) is in the void between the sheets and touches one or more silicone tubes.  This is about as accurate as you will get for the internal temperature of the panel.  The actual temperature of the water inside the tubing will be slightly cooler.  I bought my thermometer on Ebay for 6 pounds but I’ve seen them in Wilko’s and Boyes for 3 pounds.
Remove all masking tape and dust and carefully mark on your top sheet of aluminum where you are going to screw the top sheet down onto the bottom sheet, slightly compressing the tubing.  I used 12 – 20mmx 8 gauge flat headed screws.  The screws don’t have to be self tappers, ordinary hard steel wood screws.  Drill small pilot holes to maximize the grip you get when you tighten the screws.

Double check the position of the holes before you drill because if you pierce the silicone you will have to replace the whole serpentine, I don’t think a joint would survive the heat.  Before you fix your top sheet give it two coats of matt black paint, preferably heat resistant, like the paint you would spray an exhaust or engine with.  As you fix the top sheet down you will feel the tubing being slightly compressed, don’t go mad or you will strip the aluminum of the bottom sheet (its only 1mm thick).  Having done this blow down the tube to check there are no kinks or obstructions then go and get a tea/coffee/beer.

I fitted a couple of small rubber door stops to protect the ‘in’ and ‘out’ tubes from being snagged or torn with moving the panel.  The shaped ends of my frame also help to protect the tubes from damage and I think they look good.

All that remains now is to fit the cover.  The cover is there to eliminate cooling breezes and keep out the weather and insects.  I used twin wall 6mm polycarb sheeting and had to buy a whole sheet which cost 40 euros (about 35 pounds).  This was 3 times more than I needed.  Find somewhere that does cut to size to avoid waste and reduce costs.  You could use ordinary 4mm glass but the disadvantage is that the weight would hugely increase the overall weight of the panel.  The other disadvantage is the fragility of glass, a hailstorm of the sort we get in Spain would destroy the glass.

I used white plastic U section to fix the 6mm cover.  Its best to use 8mm as 6mm may be very tight.  Experiment a little with the U section and choose a section that is tight but not too tight.  The U section cost me 6 euros for 2 x 2m lengths.

Fix the top and the two sides with small 12mm 4 gauge round headed screws, forming mitres at the corners.  Work out where your cover will extend to (flush or just past the bottom rail) and mark the mitres so that the bottom piece of U section is fixed to the cover with silicone sealant.  This makes it look nice and neat and it’s very easy to remove the cover for maintenance.

If you have calculated your sizes accurately you should have a 6mm step from the U section to the top of the frame.  It’s not mandatory but the ‘joiner’ in me knows it looks much better set back in ‘reveal’ a little.

Assuming you have primed and undercoated your frame now it’s time to gloss it.  I used ordinary white gloss.  As far as the flat plate collector goes that is essentially it.

To test it, find a way of filling the panel, getting rid of any air bubbles.  If you experiment with silicone and polythene tubing you will find a way to go from silicone to polythene.  My 9mm silicone fits snugly inside 10mm polythene and if you use a short piece of 6mm microbore black irrigation hose you can use a standard car radiator hose clip to make the connection.  Don’t use jubilee clips, they don’t work well below 12mm diameter tubing.  The clips were off Ebay and cost about 1 pound each.

Your testing can be with pause/pump or continuous flow.  I simply use a couple of clothes pegs and a funnel to fill the panel with cold water (about 15 degrees C) and place my panel in the sun.

Be careful!  Not that this is as important in the UK but in southern Europe the panel becomes VERY hot VERY quickly.  After 15 minutes from a start temperature of 20 degrees my panel was 70 degrees and after 30 minutes it was 90 degrees and rising quickly.  If I had left the panel out there for 5 more minutes it would have blown the pegs off and boiled.  When I released the pegs at about 95 degrees pressurized water and steam shot out nearly scalding me…

I estimate the surface temperature of the black top sheet of aluminum was about 120 or 130 degrees!  This is really a warning about the consequences of a blockage or a pump or timer failure.  Any components in contact with the internal parts of the panel must be able to withstand temperatures of at least 150 degrees C.  I have seen temperatures quoted for flat panel collectors at 200+ degrees C.  I think that is a little exaggerated, even in Spain.

Silicone is OK up to about 250 degrees C, polythene would melt.

I am currently testing the pause pump method and preliminary figures are that after 15 minutes in full sun I can pump for about a minute and move about half a litre of water at 55+ degrees.  The quantity isn’t much but remember it’s a one third model of full panel.

Continuous pumping from 20 degrees raises the temperature to 35 degrees.  Again you have to remember that once your tank is full the panel is heating pre heated water.  It’s the first 2 or 3 hours from cold that takes the time.

My next blog entry will be how I capture my hot water and insulate it.

Hi

Ok not sure where to begin.  I have a new project that I will blog as soon as I can but I’m still working on the pool heater and still learning things about the dynamics of hot water etc.

The problems with the collector overheating and filling with air made me lay it almost flat (about 15 degrees) and in this position the water is easily pumped through the collector.  BUT it also improves the performance of the collector by miles!  My thoery is that when the spiral is in a near vertical position the dynamics of hot water rising restricts the convection of the lower part of the spiral.  In its 15 degree position it heats up to 60 degrees in 25 minutes and can continuously pump the 19 degree pool water up to warm shower temperature (35 degrees)!

This has been a great discovery and makes me rethink the design a great deal.  If I do this type of project again and have some more space to position the collector near horizontal I would build a mirror concentrator to allow for the poor alignment with the high summer sun.

I have learned many things with this project but the most valuable thing is that you only truly learn things when things don’t go quite to plan.  The ‘problems’ have been my learning curve.

NEWS UPDATE 26-07-2011

The submersible pump has burned out……Bought a new one on Ebay for 8 quid and 4 quid delivery to Spain.

A taster for my next project…….Question…Is it possible to boil water in a flat plate collector?

You bet it is.  Yes I know its Spain but it wasn’t a super hot day.  We were eating and trying out the new super duper flat plate collector and in an hour when we released the clips on the silicone tubes I nearly scalded myself, steam noise……I estimate the surface temperature of the black top sheet of aluminium was 120 degrees.


Hi

This week I remounted the three PV panels and used an ingenious bracket to fix them…a 1 euro sweeping brush handle


In full sunlight the output of the three panels (I rewired them in series to give 30v open circuit) isn’t quite enough to start the motor with the collector near vertical.  With the collector at about 45 degrees it works!

So…partial success but some problems.  The panels have only about 3 hours in direct sunlight and after 5pm they are unable to turn the pump.  So, I decided (reluctantly) to use my spare controller and battery to power the pump.  It does this easily but if I pump continually the charging can’t keep up with the pumping and it drains the little 6amp hour battery.


So, I now have some inter-related issues to experiment with.  Due to shade and orientation the panels will not be able to power the pump.  Therefore the battery is need to provide the initial power to start the pump and to keep it running when the panels are in partial shade.

I have fitted an isolating switch on the battery and I want to add a 2 or 3 amp fuse to the positive side of the battery too.  I now need to fit a switch to the pump side of the controller so that I can turn the pump on intermittently.  I know this isn’t very slick but I can’t find a 12v timer anywhere and until I do I have to empty the collector or after 50 mins it nearly boils and get locked up with air.

Any suggestions welcome……PLEASE!

This week I had a chance to test the new improved pool heater and measure the surface and water temperatures with thermometers.

Directly facing the sun the surface temperature of the panel reaches 70 degrees and the water within the tubing about 55 degrees.  This is scalding hot water and fills a 10 litre bucket.  It seems to take about 25-30 minutes to reach 50 degrees and about 2 minutes to pump it out.

This raises an interesting question about the pumping.  Is it better to pump intermittently (every 25 minutes for 2 minutes) or pump continually?

There are teething problems with the solar panels……The three small panels wired in parallel do not have the power to move the water through the upright spiral, neither does my briefcase solar panel.  Obviously the 12v transformer from last year moves the water fine but that’s not how I want it to work.

This weekend I will experiment with wiring the panels in series and see whether the under load voltage of the panels (approx 15v) is better for the pump…..

The problem is the sheer resistance of water in the spiral.  I may need to move the panel from its current position on the wall too, the ‘window’ of direct sunlight is too short.  I will try to mount it on a TV stand type articulated arm so that I can get it tracking the sun.

Anyhoo, will post more next week.  It is very hot here in Madrid….35+ degrees!

Hiya

The improvements to the spiral (8cm insulation and a hinged stand) were amazing.  This weekend it was exceptionally hot (30c) but I put the spiral into the sun at about 5.30pm and after about an hour noticed a bulge in one or two areas of the spiral.  The surface temperature of the plastic was unbelievable, the irrigation tubing was soft like silicone and almost impossible to touch.

I’ve bought a thermometer on Ebay that has a probe and measures up to 250c so I will measure it next time but I estimate the temperature was at least 80c and the water in the tube was about the same.

The insulation was incredible, no heat behind the panel and the front of the panel took at least 15 minutes to cool down even with fresh water in it!

Picture Size:

Hi
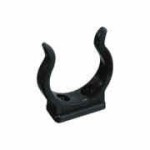
My pool heater (previously featured:)) was in need of a bit of TLC.  The weight of water in the spiral and the temprature had distorted the spiral and some of the fixings were loose.  I think I commented before that if I did the project again I would use 16mm black tube clips like this or similar .

It would add to the cost of the spiral and would be tedious but really every line of the hose needs clipping at at least the 4 quadrants.  The other advantage is that it opens up the hose and exposes more of the black base and the sides of the hose which should absorb more heat……

In a skip outside my house in Madrid there were loads of expanded polystyrene blocks 1100x225x80 that had been packing for some roof panels.  They are now liberated and with the best Eco principle of re-use before recycling.  The insulation is to reduce the heat lost through conduction in the base and hopefully increase the temperature of the hose.

The spiral will have a new plastic cover too, the old one was a bit opaque and had a couple of holes.  Not related to solar projects but I also got a cheap and cheerful irrigation system working for the garden.  It works on nothing less than siphonage!  A hose from the bottom of the pool passes the dirty pool water (still very clean for gardening) and is dribbled onto plants and pots by making holes in a second older piece of hose.

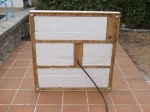
So the finished item (less the new piece of plastic for the cover) is the last image here.